There is a lot of differences between Alfred Free and Alfred Powerpack edition. The upgrade from Free to Powerpack edition will change the way you navigate files and control Mac. To help you getting started with this amazing utility, check out these Alfred Powerpack tips.
1. Install Workflows
Workflows are essentially the reason you pay for Powerpack. You can build workflow to create features that are unavailable in Alfred by using AppleScript, shell script, or Terminal command.
Thanks to Alfred community, you can find most of the common workflows in the official forum. There is also a workflows directory called Packal where you can browse workflows and themes. You can use Packal workflow to keep all your workflows updated.
Not sure which workflow you should get? I have a few list of workflows every Alfred 2 users must install.
2. Setup File Selection Shortcut
The next thing you should do after unlocking Powerpack is to configure your file selection shortcut. You can find it under Features » File Search » Actions panel. This shortcut is important because it’s going to be the feature you use often while working with files.
When we select files in Finder, we want to take actions. These actions usually require the need to use mouse cursor like moving files between folders, compressing selected files, or sending them as attachment via email. Alfred simplify the process by letting you act onto those files with actions.
Alfred comes with a set of default actions such as Open with…, Copy To…, and Move To… which are the common actions we do in Finder. You can create more actions by installing workflow and do tasks like creating a new note in Evernote, optimizing selected images in ImageOptim, or even managing Finder tags.
You can also act onto these files directly with Alfred built-in files browser.
3. Create Custom Searches Workflow
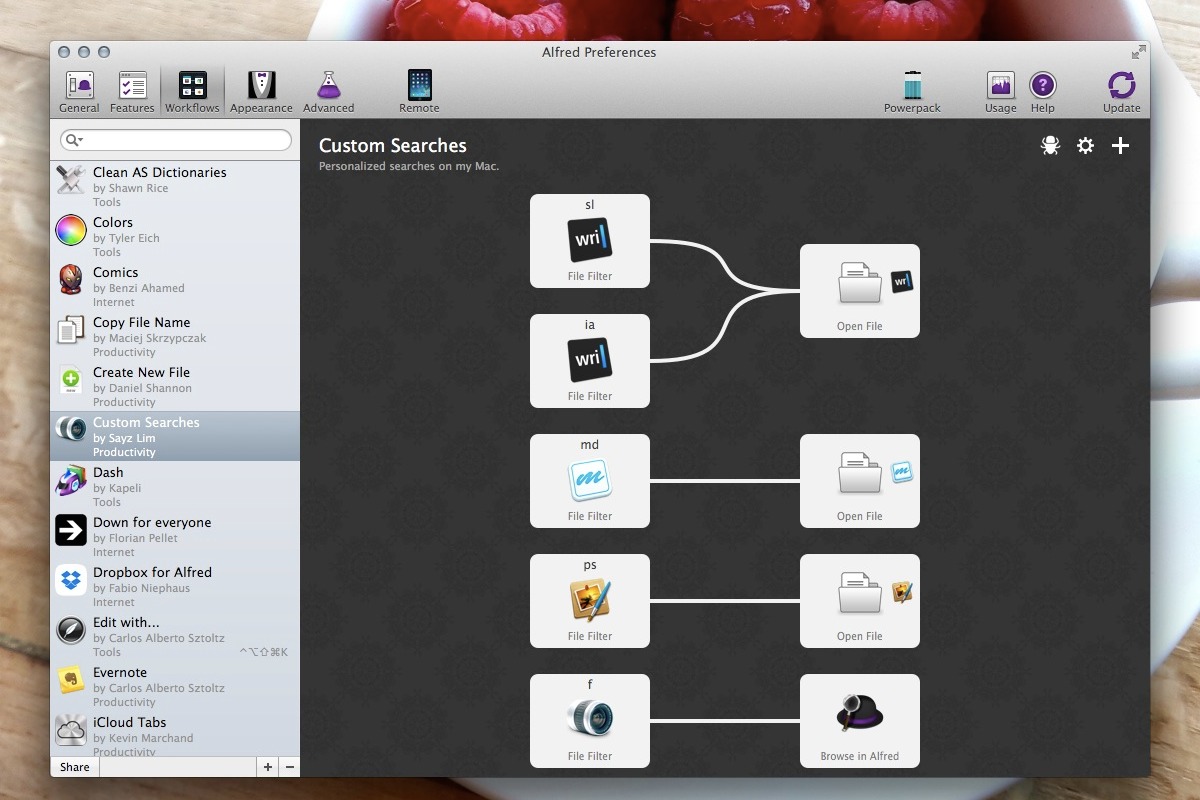
The first workflow you should create is Custom Searches which groups all your File Filter triggers in one location. One of the purpose of this workflow is to help you search files based on their types. I have a File Filter that only searches for all the Markdown document and open the selected file in Writer Pro. You can also choose different action for selected result such as Reveal in Finder or Open with Marked.
My favorite trigger is filtering and browsing folders in Alfred. Instead of creating a new window in Finder, I can just view the files inside folder by entering f <folder name> into Alfred. Need to show recently opened Sublime Projects? Create a file trigger that filters all the sublime-project filetype, then type period as your search query.
4. Limit Fallback Results
Alfred Free edition only lets you search Google, Amazon, or Wikipedia in fallback results, but with Powerpack you can customize the fallback results. Just because you can choose which search feature you want to display doesn’t mean you should include everything in fallback results. The key to use Alfred efficiently is to maintain the list small, relevant, yet still powerful.
Here’s my suggestion to keep your default fallback results clean and powerful. Only use I’m feeling lucky and Google as your default fallback searches. I explained why I choose this setup in this post. The short answer is you have an almighty bookmark service in that I’m feeling lucky button.
I also recommend putting this Evernote for Alfred workflow in your default fallback results. Unlike Google that lists all information on Internet, you can trust Evernote for revisiting knowledge you’ve collected across the time.
5. Leverage Clipboard Snippets and History
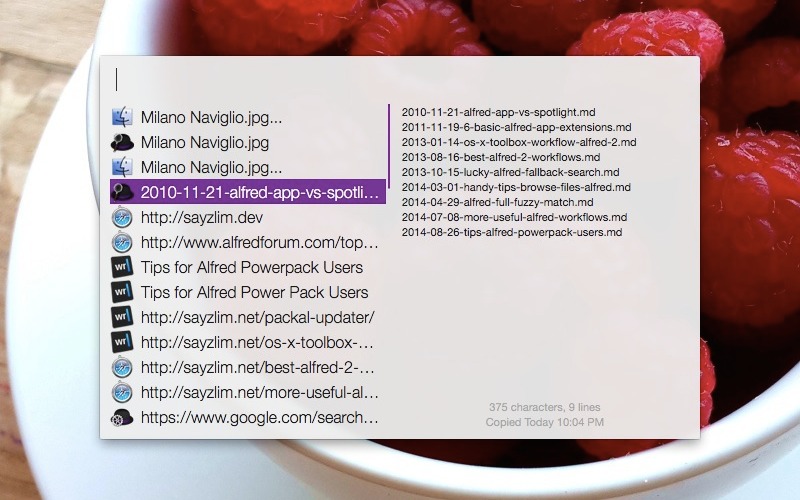
Clipboard is one of the most essential tool in every operating system. The Powerpack edition unlocks clipboard history which lets you search, browse, and preview the past text-based clipboard. 1Each clipboard item is accompanied with an icon to differentiate the source of clipboard. You can also view the content of clipboard in the sidebar by scrolling through the list.
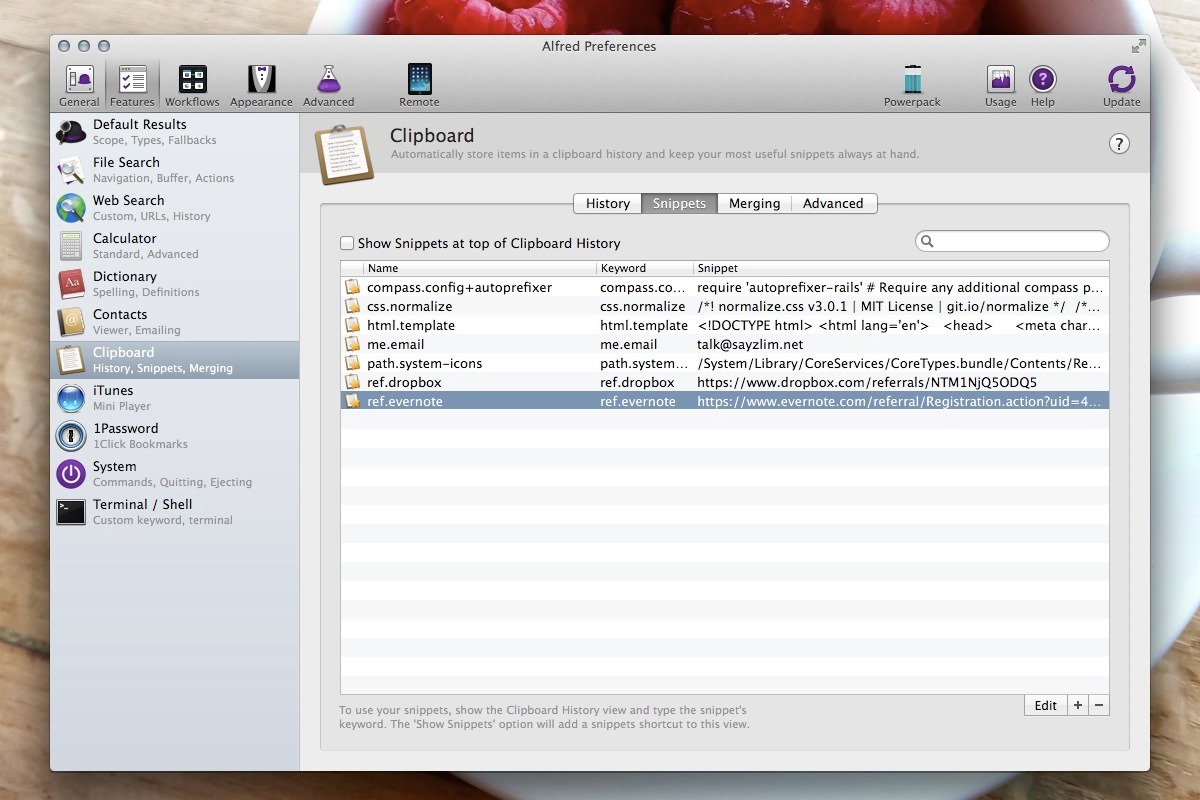
Another feature you get from unlocking Powerpack is snippets. Store your email address, home address, or your identification number as snippets, and find them in clipboard viewer whenever you need it. This is the feature I rarely use because I store most of my snippets in TextExpander. I’ve written a post on how to organize TextExpander abbreviations which you can follow to keep the snippets in Alfred organized.
6. Contacts Custom Actions
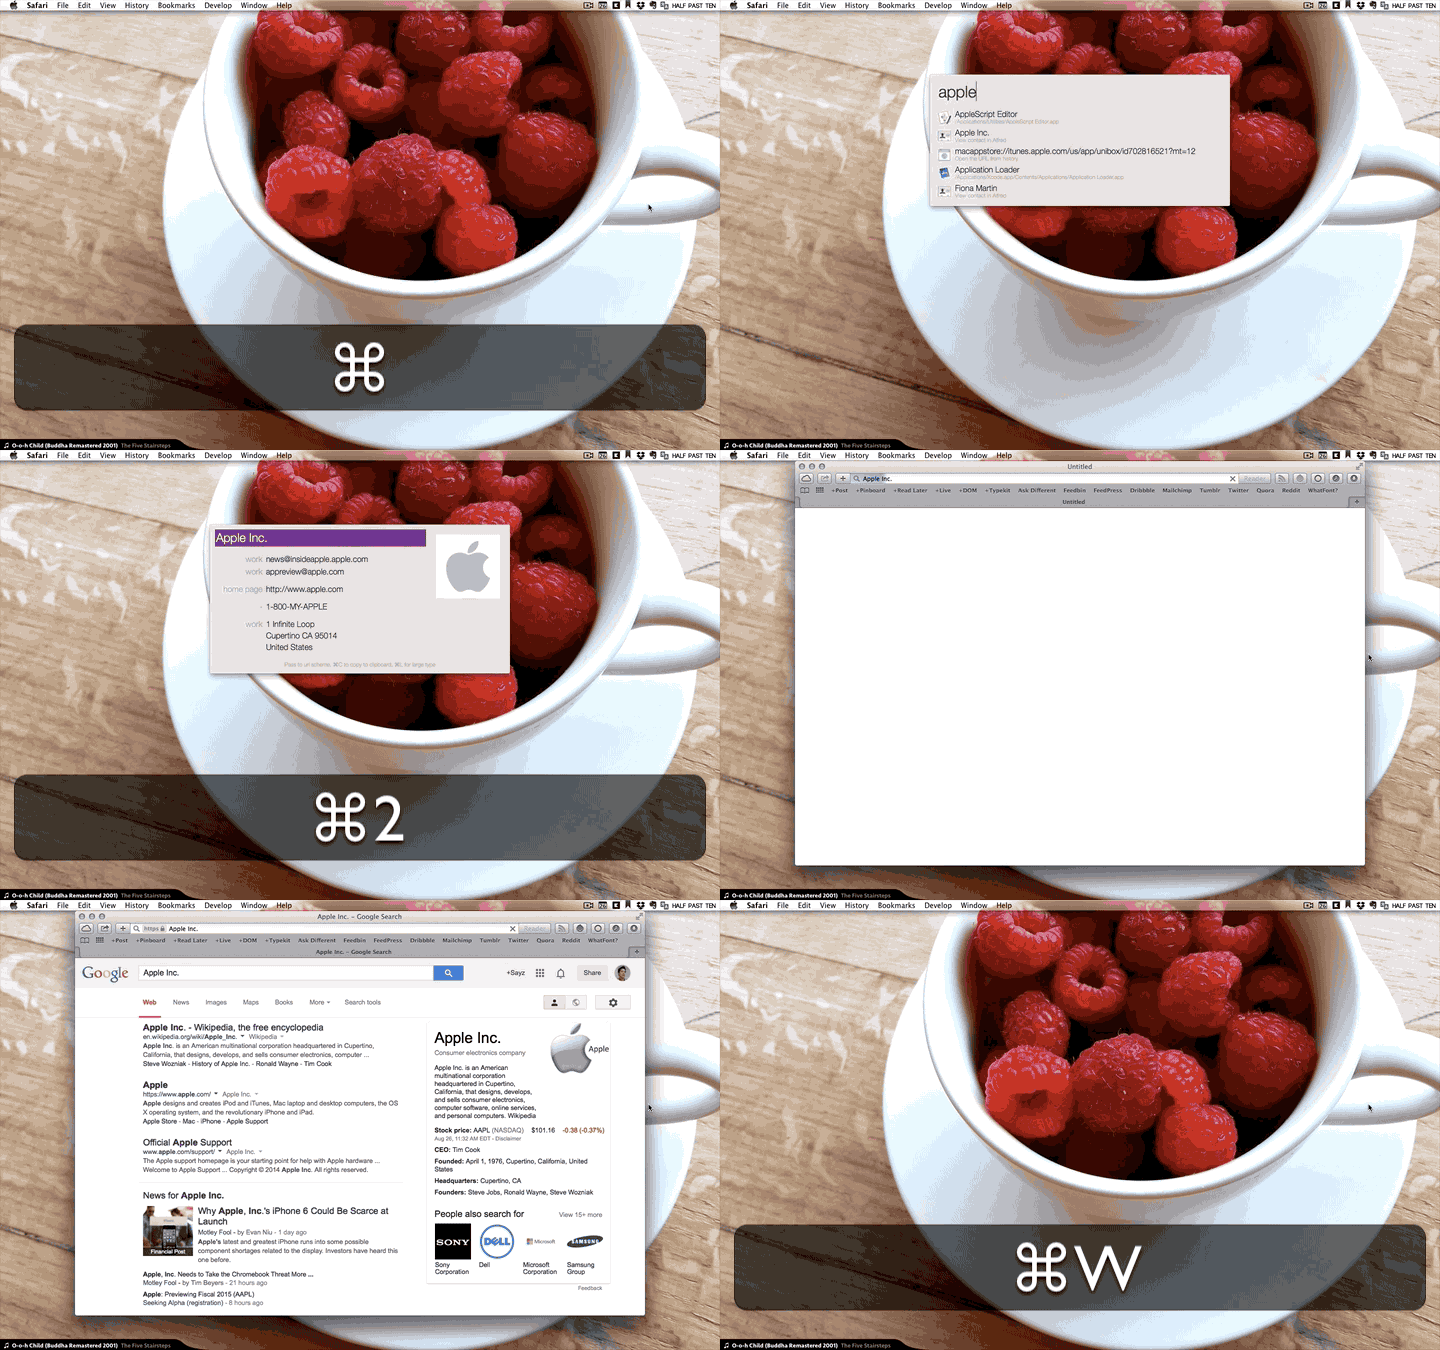
Here’s another cool trick to customize Alfred’s contacts viewer. When you choose a contact detail in Alfred contact viewer, by default, Alfred copies the contact detail into clipboard. But you can add custom URL actions, which turns out to be URL scheme, for each contact field. Contact field such as Twitter, Facebook, and LinkedIn are automatically configured — you can still modify the URL scheme.
I prefer to use https://www.google.com/search?q={query} in Name contact field whenever I want to find out the people I just met. That’s a quick way to understand the background of that person and prepare yourself to be a mind reader.
Alfred doesn’t support image clipboard because it wants to maintain minimum memory usage. ↩


