There is no perfect setup. Not mine, not yours. We organize folders in our own ways.
Even Mac experts organize their mountain of files differently. You pick a few lessons from them and come up with your own setup. My setup is suitable for people who want to synchronize their files across devices while maintaining the number of folders small.
If you’re like me, carry on reading this post.
Store almost everything in Dropbox
No, not the movies and music folder; I’m talking about the rest of the files that you want to access remotely. Don’t bother to sync music or movies; you can stream them online nowadays.
It takes less than 2 GB to store all my files.
I only use that much storage because I store all my reference files in Evernote. The free plan gives me unlimited storage with 60 MB monthly upload quota. Since I only save text files — mostly coming from Evernote Web Clipper — the monthly quota never bothers me. I can even keep the history of my online activities with Evernote.
The documents I store in Dropbox fall under these categories:
- Notes – The location where I store notes in plain text.
- Photos – Any type of image goes here.
- Projects – All the active projects stay in this folder.
- Safe – My iCloud in Dropbox, I save apps specific files in this location, grouped by folders.
As you can see from the structures above, raw files like images and text files are not bound to any specific apps. I don’t need iPhoto to view these photos, I can use Writer Pro, Byword, or even Sublime Text to edit text files. Storing all documents in Dropbox means I can sync them to iPhone, iPad, and other Mac easily.
Plan documents flow for each folder
Documents flow describes the characteristic of each folder:
- What purpose does the folder serve?
- What is the structure of each folder? What files does it store?
- How to retrieve the files stored in the folder?
Dropbox creates 3 default folders: Apps, Photos, and Public. These folders are useful. Apps stores the configuration files for third-party apps, Photos is where you store images, and Public is for files you want to share with the public.
Here are the document flows I’ve assigned for each folder:
Notes – I need a quick way to jot down notes on Mac. It has to be an app that works universally and plays well with plain text — learn why you should use plain text. This means I can freely create a plain text file from everywhere, and also access it with any apps. By far, nvALT by Brett Terpstra is the best app for this task.
Set Notes as the source of your text files. Configure a keyboard shortcut to toggle nvALT everywhere. My preferred key combination is Hyper-E.1
If you’re a Writer Pro user, you might want to bring all your notes into this folder. You can achieve this by creating a symbolic link for each folder from iCloud to Dropbox.
Photos – I’ve moved all my photos from iPhoto to Dropbox. Organizing photos without relying third-party apps has many benefits. I can choose to open photos with Pixelmator, Sketch, or Photoshop. I can access those photos from Android devices. I can also share those photos easily with Dropbox Sharing. I hate naming files; it’s a time wasting task. That’s why I use Hazel and Pixa to manage photos in Dropbox.
Projects – Store all the active projects on folder basis here. By sorting based on the last opened date2, I can keep the most active projects on top of the list.
When you’re working on a project, you’ll accumulate an abundance of reference files for that particular project. I prefer to keep them inside the project folder instead of Evernote.
Mavericks incorporate tagging feature for us to organize files. But how do we decide when to use tags as opposed to folders?
Aleh Cherp answered this question in his post on tags and folders usage:
For the last three years, I have consistently used folders for project files and tags for reference files in academic work.
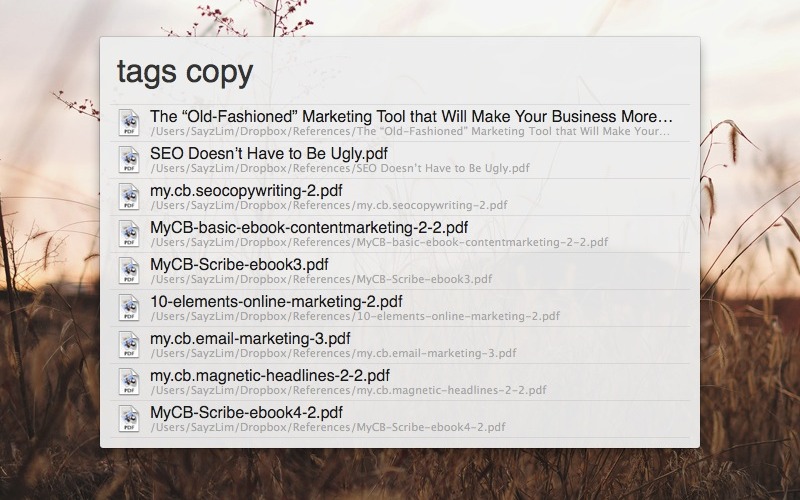
The point of tagging is to simplify the searching flow. With Alfred, you can use tags keyword to show specific tagged files in search result.
I usually store long term reference files like articles, tutorials, or e-books in Evernote. If, by some chance, one of these files fall under these categories, I’ll save them into Evernote before archiving these projects.
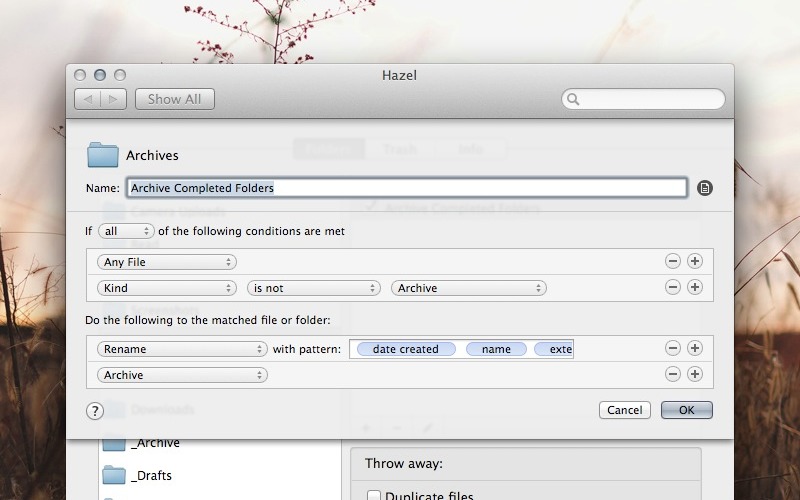
Create a folder called Archives and move all completed projects into this location. I have Hazel rules that monitor any incoming folders, prepend with these folders created date, and zip them to save spaces.
Safe – This folder is unique to the apps you’ve installed. Most of the time, when you’re not working on a particular project, you’ll create some files that are unique to apps. Data like psd is for Photoshop, pxm for Pixelmator, and sublime-project for Sublime Text. I prefer to keep them all in one place, like how each app on iPad stores their documents in iCloud.
Unlike Documents in iCloud, you can open those files with any apps.
Name all the folders with the app name. Replace the folder icon with the app icon. Here is the quick tutorial on replacing Pixelmator folder icon:
- Select Pixelmator app and press
Command-Ito get the information window. - Select the icon in the information window and press
Command-Cto copy the icon. - Select Pixelmator folder in the Safe folder and press
Command-Ito get the information window. - Select the icon in the information window and press
Command-Vto paste the Pixelmator icon.
Repeat for all the folders in Safe.
In Conclusion
What I’ve learned from organizing those files is to lessen the amount of user participation in organizing data. Avoid renaming files you’ve downloaded, avoid tagging files that don’t need it, and avoid moving all the files manually. Automate what you can automate.
Find the setup that works for you, but remember to keep the structure simple. A few years later, we might use different tools to access the files we have today. When that time comes, you won’t have to get busy exporting all the notes and photos.


